
A deck is only as safe and functional as its railing. Whether you’re finishing a new composite deck or upgrading an aging wood structure, building deck railing requires careful attention to code, materials, and technique, but it’s absolutely within reach for a confident DIYer. This guide walks you through every step, from understanding local safety requirements to the final coat of sealant. You’ll learn what codes govern deck railings, which tools and materials matter most, and how to install a railing that’s both solid and looks the part.
Table of Contents
ToggleKey Takeaways
- Building deck railing requires compliance with local codes, including a 36-inch minimum height and 4-inch baluster spacing to prevent children from falling through.
- Posts must be securely fastened with at least two ½-inch bolts and plumbed vertically, as proper foundation prevents structural failure and wobbling under pressure.
- Measure twice and mark once when planning post locations—adjusting spacing slightly at corners ensures balanced aesthetics and prevents wasted materials.
- Secure top and bottom rails with staggered fasteners at each post connection, as this resistance to twisting is where your railing’s strength truly lives.
- Seal or stain your completed railing every 2–3 years to protect wood from UV damage and moisture, ensuring your installation outlasts decades of weather exposure.
- Check with your local building department before starting, as a $50 permit is far cheaper than potential fines or forced removal of non-compliant work.
Understanding Deck Railing Codes and Safety Requirements
Before you drive a single nail, know the rules. Deck railings aren’t optional, they’re required by the International Residential Code (IRC) on decks over 30 inches high, and most jurisdictions enforce this strictly.
Here’s what matters most: the railing must be at least 36 inches tall measured from the deck surface to the top rail (some regions require 42 inches, check your local code). The spacing between balusters (vertical spindles) cannot exceed 4 inches, imagine the 4-inch sphere rule: a sphere 4 inches in diameter shouldn’t pass through any gap. This prevents children from getting stuck or falling through.
Railing posts must be able to resist a 200-pound horizontal force without failing. Translation: no wobble when you lean hard on the rail. Post spacing typically maxes out at 6 feet, though some codes allow 8 feet for substantial posts.
Building permits vary by jurisdiction. Some areas require a railing inspection before decking is considered complete: others don’t. Call your local building department or check their website before you start, a $50 permit beats a $5,000 fine or forced teardown. If you’re uncertain about load calculations or structural requirements, a professional engineer or contractor’s stamp may be required.
Tools and Materials You’ll Need
Materials:
- Posts: 4×4 pressure-treated lumber (or cedar, composite alternatives) for vertical supports
- Rails: 2×6 or 2×4 pressure-treated lumber for top and bottom horizontal members
- Balusters: 2×2 or 2×3 spindles, or decorative aluminum/composite options
- Fasteners: 3-inch exterior-grade deck screws (stainless steel or coated) for posts: 2.5-inch screws for rail connections: galvanized or stainless bolts for post footings
- Concrete: 80-pound bags of post-setting concrete (if installing posts into ground)
- Sealer/stain: Exterior-grade finish rated for UV and moisture resistance
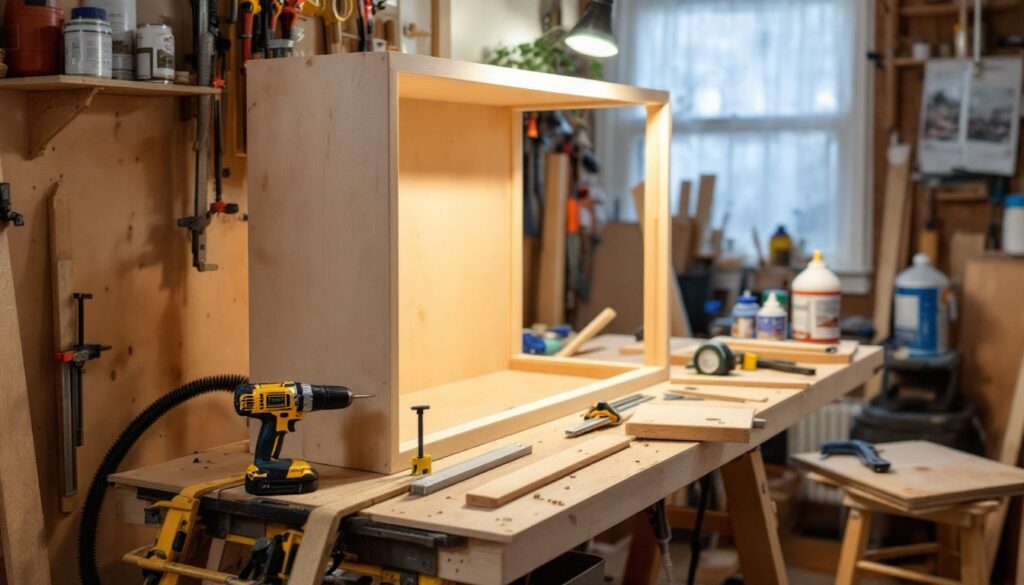
Tools:
- Circular saw or miter saw (miter saw gives cleaner angle cuts)
- Drill-driver and impact driver
- Measuring tape, level, and speed square
- Clamps and sawhorses
- Pneumatic nailer (optional but faster for balusters: hand-nailing works fine)
- Safety gear: eye protection, work gloves, hearing protection when using power tools
You’ll also want a railing spacing jig, a simple 4-inch piece of scrap works as a template to keep balusters evenly spaced.
Measuring and Planning Your Railing Layout
Accurate measurement prevents wasted material and a lopsided result. Start by measuring your deck’s perimeter where the railing attaches. Mark post locations on the band board or rim joist using a pencil.
Decide on post spacing, typically 4 to 6 feet apart. Longer spans require beefier posts and heavier top rails. Measure twice, mark once. If your deck length isn’t a clean multiple of your post spacing, adjust the spacing slightly at corners so it’s balanced. A post spacing that varies from 3 feet 11 inches to 4 feet 1 inch is invisible but far better than one section at 3 feet and the next at 5 feet.
Determine baluster spacing by counting how many 2×2 or 2×3 spindles fit between posts while respecting the 4-inch gap rule. A simple formula: [(span in inches − 3.5) ÷ (spindle width + 4-inch gap)] = number of balusters. Round down and adjust gaps slightly.
Draw a sketch, even on scratch paper, showing post locations, baluster count per section, and rail heights. This becomes your blueprint and prevents mistakes mid-installation.
Installing Posts and Securing the Foundation
Posts are the backbone. They must be rock-solid.
Step 1: Cut your posts to length. If attaching to an existing deck, posts typically extend from the rim joist or ledger board upward: calculate the height so the top of your assembled railing sits at the required 36-inch minimum. Account for the thickness of the top rail.
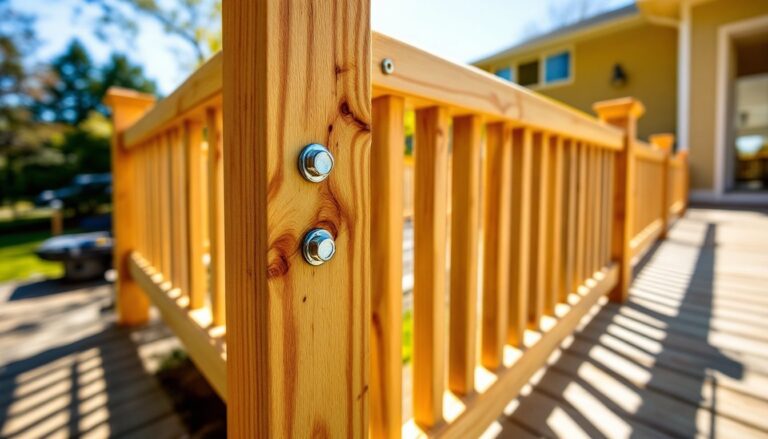
Step 2: Attach the post to the deck. Use a post base or bolts (at least two ½-inch bolts per post). If fastening to the rim joist, drill pilot holes slightly undersize to prevent splitting, then drive 3-inch exterior-grade screws or bolts. Spacing bolts 6 to 8 inches apart works well.
Step 3: Plumb each post vertically using a level on two adjacent faces. Shim if needed (galvanized steel shims or composite) before tightening fasteners fully. A post that’s off by even ½ inch will throw off your entire railing alignment.
Step 4: Install a temporary brace, a 2×4 angled from the post to the deck, to hold it plumb during assembly. Remove after the top and bottom rails are attached.
Check codes about footings if posts sit on ground: some areas require concrete footings below the frost line. This isn’t a shortcut area.
Building and Attaching Rails and Balusters
With posts locked in place, the railing frame comes together.
Installing the top rail:
Measure the distance between posts at the height where your top rail will sit. Account for any slope (many builders mirror the deck slope, typically 1/8 inch per foot, though flat is fine). Use a miter saw if you’re joining the rail end-to-end: butt joints over posts are simpler for DIYers.
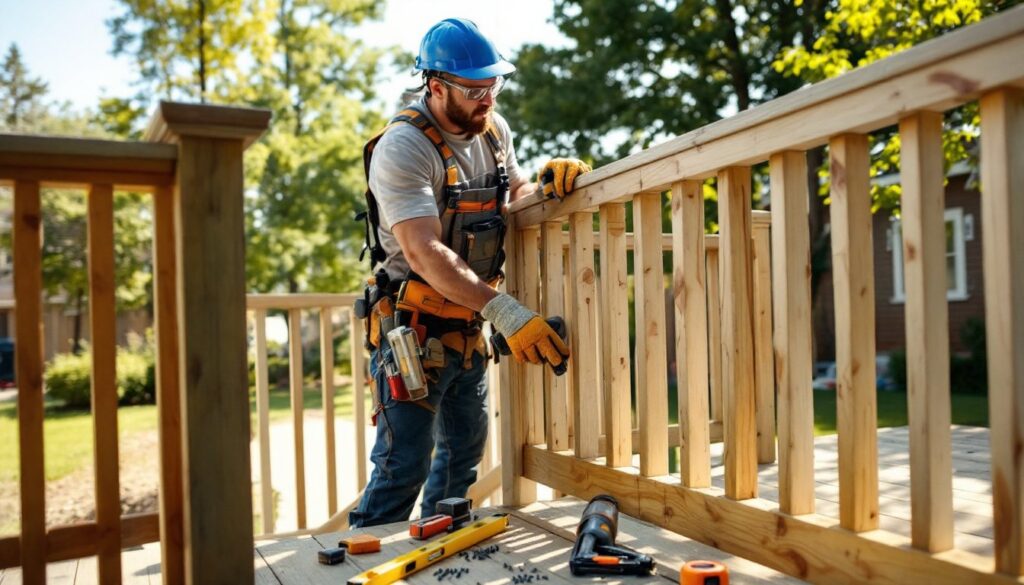
Screw the 2×6 top rail to the posts using two 3-inch exterior-grade screws per connection, staggered vertically to resist twisting. Predrill holes to avoid splitting end grain. The top rail must feel immovable when you push on it, this is where railing strength lives.
Installing the bottom rail:
The bottom rail sits 4 to 6 inches above the deck surface (check local code). Attach it the same way as the top rail using 2.5-inch screws, two per post.
Spacing and installing balusters:
This is where a jig saves time. Cut a 4-inch spacer from scrap and use it to position balusters evenly between the top and bottom rails. Secure each baluster with two 2.5-inch screws at the top and two at the bottom, drive screws at a slight angle (about 15 degrees) to resist pull-out. Alternatively, use a pneumatic finish nailer with 16-gauge nails (faster, though slightly less strong than screws).
Work section by section. As you install each baluster, double-check spacing with your 4-inch jig. A crooked baluster is visible for years. Most DIYers find balusters the most time-consuming part, take your time and stay consistent.
Finishing Touches: Staining, Sealing, and Maintenance
Raw wood railings don’t last. Sun, rain, and freeze-thaw cycles degrade unprotected wood within a couple of seasons.
Prep and finishing:
Sand the entire railing with 120-grit sandpaper to smooth splinters and prepare the surface for finish. Pay attention to cut ends and areas where hardware protrudes. A random orbital sander speeds this up, but hand-sanding or a belt sander works too.
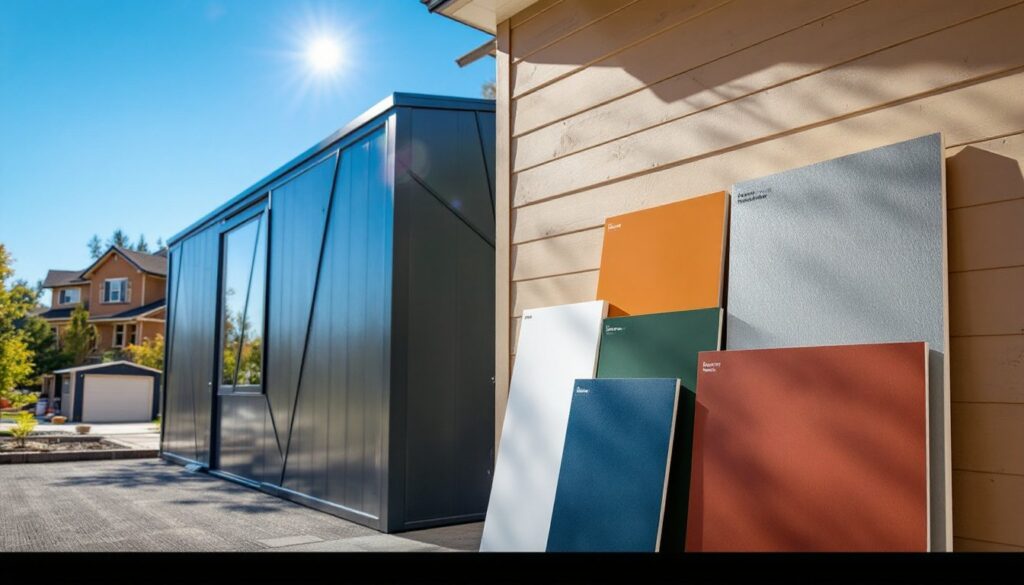
Apply a primer if you’re painting, or go straight to exterior stain or sealer for a natural look. Choose a product rated for horizontal surfaces and UV protection, this old house standard finishes include exterior acrylics and oil-based penetrating sealers. Follow product instructions for drying time and recoat windows: most require a second coat.
Maintenance:
Seal or stain every 2–3 years depending on climate and finish type. Check baluster connections annually for tightness (recoat screws if necessary), especially after winter. Inspect the wood for rot, particularly at post-to-rim connections where water pools. Pressure-treated lumber resists rot better than untreated, but it’s not immune.
Aluminum and composite railings require less upkeep, a periodic wash and maybe a protective coating every few years. If you’re building for the long term with minimal maintenance, these alternatives justify their higher upfront cost. Fine homebuilding pros often recommend composite railings for coastal properties or high-moisture areas.
Conclusion
Building a deck railing isn’t glamorous, but it’s the difference between a safe outdoor space and a liability. Follow code, don’t cut corners on posts and fasteners, and give yourself time for precise measuring and assembly. Whether you choose traditional pressure-treated wood or modern composites, the fundamentals stay the same: sturdy posts, solid rails, balusters spaced to code, and a finish that protects your investment. A railing built right will outlast the deck beneath it, and keep your family and guests safe for decades.